To Share is to Show You Care!
When working on DIY projects, encountering stripped screws, nuts, and bolts can be frustrating and time-consuming. However, with the right techniques, you can easily avoid such mishaps and ensure smooth progress. In this article, we will reveal the best practices to prevent stripping and damaging of screws, nuts, and bolts. Whether you’re a seasoned DIY enthusiast or just starting out, these tips will help you tackle your projects with confidence and precision.
Key Points
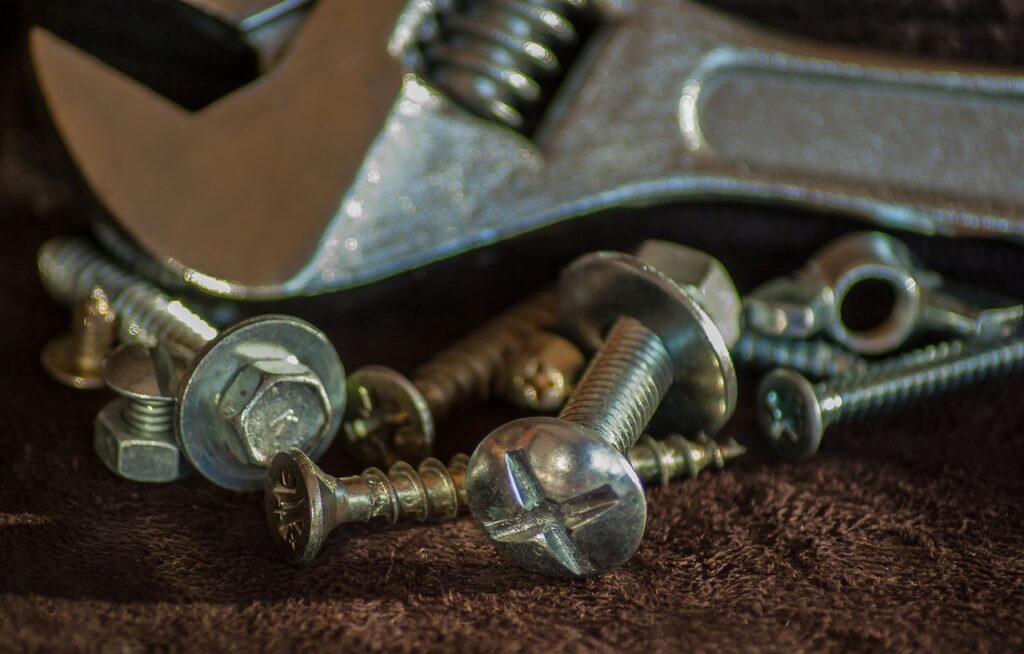
1. Use the Right Tools
- Invest in high-quality screwdrivers, wrenches, and pliers that match the size and type of fasteners you’re working with.
- Select screwdriver bits with a snug fit to avoid slipping and stripping.
- Consider using specialized tools like impact drivers or nut drivers for increased torque and grip.
2. Apply Adequate Pressure
- Apply steady and firm pressure when turning screws, nuts, and bolts to ensure proper engagement and prevent slippage.
- Avoid excessive force as it can lead to over tightening or damaging the fasteners.
3. Prepare the Fasteners and Surfaces
- Clean the screws, nuts, and bolts as well as the corresponding holes or threads to remove any debris or rust.
- Lubricate the fasteners with a suitable lubricant, such as WD-40 or penetrating oil, to reduce friction and ease installation.
4. Use Proper Techniques
- Align the screwdriver, wrench, or pliers correctly with the fastener and apply force in a straight line to avoid stripping.
- For stubborn or rusted fasteners, try loosening them first by gently tapping with a hammer or using a penetrating oil.
5. Choose the Right Fasteners
- Select screws, nuts, and bolts that are compatible with the materials you’re working with.
- Consider using anti-stripping screws or those with increased gripping power, such as Torx or Robertson screws.
6. Know When to Stop
- Pay attention to the resistance encountered while tightening fasteners.
- Stop applying force once the fastener is securely tightened. Over tightening can lead to damage or stripping.
Conclusion:
By following these best techniques, you can avoid the frustrating experience of stripping and damaging screws, nuts, and bolts during your DIY projects. Remember to use the right tools, apply adequate pressure, prepare the fasteners and surfaces, employ proper techniques, choose the right fasteners, and know when to stop. Armed with this knowledge, you can now confidently tackle your projects while ensuring the longevity and integrity of your fasteners. Happy DIY-ing!
Remember, taking preventive measures is key to success when it comes to avoiding stripping and damaging screws, nuts, and bolts. Incorporate these techniques into your DIY projects, and you’ll save time, effort, and potentially expensive repairs.
Frequently Asked Questions:
Q1: What does stripping a screw do?
A: Stripping a screw refers to the process of damaging the head of the screw, making it difficult to turn or remove. This usually occurs when excessive force or improper tools are used, causing the screwdriver’s grip to slip and wear down the screw’s grooves.
Q2: Why do I keep stripping my screws?
A: There are several reasons why screws may keep getting stripped:
- Using the wrong type or size of screwdriver or wrench.
- Applying excessive force or over tightening the screw.
- Using low-quality or worn-out screws.
- Working with difficult materials or surfaces.
- Lack of proper alignment between the screwdriver and screw head.
Q3: What is stripping in bolts?
A: Stripping in bolts is similar to stripping in screws. It refers to the damage caused to the bolt’s head, resulting in the inability to turn or remove it with a wrench or socket. Stripping can occur when excessive force is applied or when using the wrong size or type of wrench.
Q4: How do you remove a stripped screw and bolt?
A: Removing a stripped screw or bolt can be challenging, but here are a few methods you can try:
- Use a rubber band: Place a rubber band over the stripped screw head, press the screwdriver firmly into the screw, and turn it.
- Try pliers or locking pliers: Grip the stripped screw head or bolt with pliers and turn it counterclockwise.
- Use a screw extractor: Drill a small hole into the stripped screw or bolt and use a screw extractor tool to grip and remove it.
- Use a hammer and chisel: Carefully tap the chisel counterclockwise against the stripped screw or bolt to create a new groove, then use a screwdriver or wrench to remove it.
Q5: What to do after stripping a screw?
A: If you’ve stripped a screw, there are a few steps you can take:
- Stop applying force: Continuing to turn a stripped screw may further damage it or the surrounding material.
- Assess the situation: Determine if there are alternative methods to remove the screw, such as using pliers, a rubber band, or a screw extractor.
- Consider using penetrating oil: Apply a lubricant, like WD-40, to the stripped screw and let it sit for a few minutes to loosen any rust or debris.
- If all else fails: If you cannot remove the stripped screw, you may need to resort to drilling it out or seeking professional assistance.
Q6: What screws are best for not stripping?
A: To minimize the risk of stripping screws, you can choose screws that are less prone to damage. Consider using:
- Torx or Robertson screws: These screws have a star-shaped or square-shaped recess, providing increased grip and reducing the likelihood of stripping.
- Stainless steel or hardened steel screws: These screws are generally more durable and resistant to stripping compared to softer materials.
Q7: Does WD-40 help with stripped screws?
A: Yes, WD-40 can help with stripped screws. It can act as a lubricant and penetrate rust or debris, making it easier to remove the stripped screw. Apply WD-40 to the stripped screw and let it sit for a few minutes before attempting to remove it.
Q8: Can you drill in a stripped screw?
A: Yes, drilling into a stripped screw can be a viable method to remove it. By creating a small hole in the center of the screw, you can then use a screw extractor tool to grip and remove the screw.
Q9: How do you fix a screw that keeps turning in metal?
A: If a screw keeps turning in metal without tightening, you can try the following solutions:
- Use a larger screw: Replace the current screw with a slightly larger one that provides a tighter fit in the metal.
- Use a toothpick or wooden dowel: Insert a toothpick or wooden dowel into the screw hole, breaking it off at the surface. Then, insert the screw back into the hole. The wood material will create more friction, helping the screw stay in place.
- Apply thread-locking adhesive: Use a thread-locking adhesive, such as Loctite, on the screw threads before inserting it into the hole. This adhesive will help secure the screw in place.
- Use a wall anchor or insert: If the metal is thin or weak, consider using a wall anchor or insert to provide more stability and support for the screw.
Q10: What is the difference between stripping and striping?
A: Stripping and striping are two different terms with distinct meanings:
- Stripping: Refers to the process of damaging or removing the grooves on a screw, bolt, or fastener, making it difficult to turn or remove.
- Striping: Typically refers to the act of applying a decorative or marking strip, often using tape or paint, to a surface. It is commonly seen on vehicles, roads, or other areas where clear markings are necessary.
Q11: Will a stripped bolt come out?
A: Removing a stripped bolt can be challenging, but it is not impossible. Here are a few methods to try:
- Use a rubber band: Place a rubber band over the stripped bolt head, press a wrench firmly onto the bolt, and turn it counterclockwise.
- Try pliers or locking pliers: Grip the stripped bolt head with pliers or locking pliers and turn it counterclockwise.
- Use a bolt extractor: Drill a small hole into the center of the stripped bolt and use a bolt extractor tool to grip and remove it.
- Apply heat: If the bolt is seized due to corrosion or rust, applying heat using a torch can help expand the metal and loosen the grip, making removal easier.
- Seek professional assistance: If all else fails, you may need to consult a professional mechanic or technician who has specialized tools and expertise in bolt removal.
Q12: What do mechanics use to remove bolts?
A: Mechanics often use a variety of tools to remove bolts, depending on the situation. Some commonly used tools include:
- Socket wrenches: These versatile tools allow mechanics to apply torque and loosen or tighten bolts of various sizes using different socket attachments.
- Impact wrenches: These power tools deliver high torque impulses to quickly loosen stubborn bolts.
- Bolt extractors: These specialized tools are designed to grip and remove stripped or damaged bolts.
- Heat guns or torches: Applying heat to bolts can help expand the metal, making it easier to loosen and remove them.
- Penetrating oil: Mechanics often use penetrating oils like WD-40 or Liquid Wrench to help loosen rusted or seized bolts by reducing friction and corrosion.
Remember, when dealing with stripped screws, bolts, or other fasteners, patience and caution are key. If you’re unsure or unable to remove them yourself, it’s best to seek the assistance of a professional to avoid further damage or injury.
The Informed Minds
I'm Vijay Kumar, a consultant with 20+ years of experience specializing in Home, Lifestyle, and Technology. From DIY and Home Improvement to Interior Design and Personal Finance, I've worked with diverse clients, offering tailored solutions to their needs. Through this blog, I share my expertise, providing valuable insights and practical advice for free. Together, let's make our homes better and embrace the latest in lifestyle and technology for a brighter future.