To Share is to Show You Care!
Drywall and plaster repair can be a daunting task for many homeowners, often leading to frustration and even more damage if not done correctly. Whether it’s a small hole, a crack, or water damage, knowing how to tackle these issues efficiently is crucial for maintaining the integrity and aesthetics of your walls. In this comprehensive guide, we’ll delve into the common difficulties encountered during drywall and plaster repair and provide practical solutions to overcome them.
1. Understanding the Challenges
Repairing drywall or plaster may seem straightforward, but various challenges can arise, including:

1.1 Adhesion Issues
Adhesion issues refer to the difficulty in ensuring that the new patch adheres seamlessly to the existing surface. Poor adhesion can result in the patching material not sticking properly to the wall, leading to an uneven or unstable repair. This can be particularly challenging when dealing with surfaces that are dirty, uneven, or damaged. Addressing adhesion issues is crucial for ensuring the long-term durability and effectiveness of the repair.
1.2 Matching Texture
Matching the texture of the repaired area with the surrounding wall can be tricky, especially if the existing texture is complex or unique. Even slight differences in texture can be noticeable, resulting in a patch that stands out from the rest of the wall. Achieving a seamless texture match requires skill and patience, as well as the use of specialized tools and techniques.
1.3 Structural Integrity
Maintaining the structural integrity of the wall is essential for preventing future issues such as cracks, bulges, or sagging. Damage to drywall or plaster can compromise the structural stability of the wall, especially if left unrepaired or if the repair is not done properly. Reinforcing the repaired area and addressing any underlying structural issues are critical for ensuring the long-term stability and safety of the wall.
1.4 Moisture Control
Moisture-related damage, such as water leaks or humidity, can pose significant challenges for drywall and plaster repair. Moisture can weaken the integrity of the wall and cause the patching material to fail prematurely. Additionally, moisture can promote mold and mildew growth, further exacerbating the damage. Effective moisture control measures, such as addressing leaks, improving ventilation, and using moisture-resistant materials, are essential for preventing future issues and ensuring the success of the repair.
1.5 Professional Finish
Achieving a smooth, professional finish is the ultimate goal of any drywall or plaster repair project. However, achieving this level of finish can be challenging, especially for those without experience or expertise in home repair. Issues such as uneven patches, visible seams, or rough textures can detract from the overall appearance of the wall and compromise the quality of the repair. Attention to detail, proper technique, and the use of high-quality materials are essential for achieving a professional finish that enhances the aesthetics of the wall and provides long-lasting results.
2. Effective Solutions

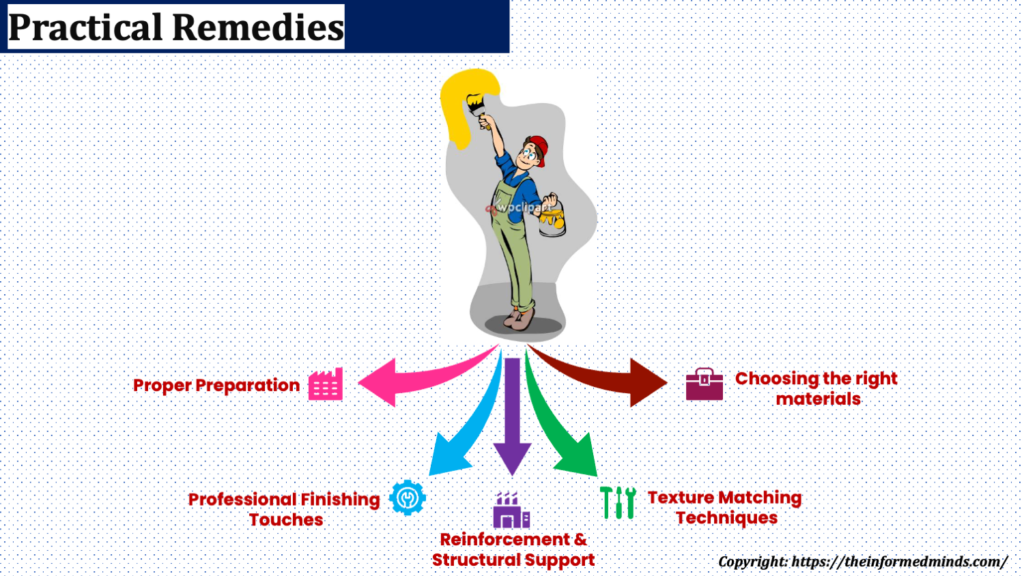
2.1 Proper Preparation
Thorough Cleaning: Before beginning any repair work, it’s essential to clean the damaged area thoroughly. Use a dry cloth or vacuum cleaner to remove dust, debris, and loose particles from the surface. A clean surface ensures better adhesion of the patching material and helps prevent future issues.
Creating Clean Edges: Use a sharp utility knife to create clean edges around the damaged area. Cutting away any loose or jagged edges ensures that the patch will blend seamlessly with the surrounding wall, creating a professional-looking repair.
Surface Sanding: Lightly sand the surrounding surface using fine-grit sandpaper. Sanding helps to smooth out any rough spots and roughens the surface slightly, providing better adhesion for the patching compound or joint compound.
2.2 Choosing the Right Materials
High-Quality Joint Compound or Spackling Paste: Invest in high-quality joint compound or spackling paste for filling small holes and cracks. These products are specifically formulated for drywall and plaster repair and offer excellent adhesion and durability.
Specialized Primer: Use a primer specifically designed for damaged drywall or plaster surfaces. This type of primer enhances adhesion and seals the repaired area, ensuring that the patching material adheres properly and providing a smooth base for painting.
Self-Adhesive Mesh Tape: For larger holes or cracks, consider using self-adhesive mesh tape to reinforce the repair. The mesh tape helps to provide additional structural support and prevents the patching compound from cracking or crumbling over time.
2.3 Texture Matching Techniques
Experimentation: Achieving a perfect texture match can be challenging, but experimenting with different application methods can help. Try using techniques such as stippling, sponging, or dabbing to replicate the texture of the surrounding wall.
Texture Tools: Invest in texture tools such as drywall texture rollers or brushes to create patterns that closely resemble the existing texture. These tools allow you to apply the patching compound in a way that mimics the texture of the surrounding wall, ensuring a seamless repair.
Feathering and Blending: Feather the edges of the patched area by gradually tapering the patching compound outward. Use a trowel or putty knife to blend the patched area with the surrounding wall, ensuring a smooth transition between the two surfaces.
2.4 Reinforcement and Structural Support
Wooden Backing or Drywall Patches: For larger holes or areas of significant damage, install wooden backing or drywall patches behind the damaged area. This provides additional support and stability for the patching compound, preventing it from sagging or crumbling over time.
Fiberglass Mesh Tape: Apply fiberglass mesh tape over cracks or seams to prevent them from reappearing. The mesh tape helps to reinforce the repair and provides additional strength and durability, ensuring long-lasting results.
Addressing Underlying Issues: Before proceeding with repairs, it’s crucial to address any underlying issues such as water leaks or structural instability. Failure to address these issues can lead to recurring damage and compromise the integrity of the repair.
2.5 Professional Finishing Touches
Multiple Thin Coats: Apply multiple thin coats of joint compound or spackling paste, allowing sufficient drying time between each layer. Thin coats dry more quickly and evenly, resulting in a smoother finish and reducing the risk of cracking or shrinkage.
Light Sanding Between Coats: Lightly sand the patched area between coats to smooth out any imperfections and ensure a seamless finish. Use fine-grit sandpaper and sand in a circular motion to feather the edges of the patch and blend it with the surrounding wall.
Priming and Painting: Once the repair is complete and the patched area is fully dry, prime and paint the repaired area to match the surrounding wall. Use a high-quality paintbrush or roller and apply paint in thin, even coats to achieve a flawless finish.
Conclusion
By following these practical solutions and techniques, you can overcome the difficulties associated with repairing drywall or plaster effectively. Remember to take your time, exercise patience, and don’t hesitate to seek professional assistance if needed. With the right approach and attention to detail, you can restore your walls to their former glory and enjoy a flawless finish that lasts for years to come. For more expert tips and guidance on home improvement projects, stay tuned to our blog for regular updates and insights!
Frequently Asked Questions
Q1: How hard is it to repair plaster walls?
A: Repairing plaster walls can be moderately difficult, requiring skill and patience to properly patch cracks and holes while matching the texture of the existing plaster.
Q2: Is it easier to plaster or drywall?
A: Drywall installation is generally easier and faster than plastering. Plastering requires more expertise and time due to the multiple layers and drying time involved.
Q3: Is drywall hard to repair?
A: Repairing drywall can vary in difficulty depending on the extent of the damage. Minor repairs like filling small holes are relatively easy, but larger repairs may require more skill and effort.
Q4: Is it cheaper to repair plaster or replace with drywall?
A: In many cases, it’s cheaper to repair plaster walls than to replace them with drywall, especially if the damage is minor. However, extensive repairs or multiple patches may tip the cost scale in favor of drywall replacement.
Q5: Is plaster as strong as drywall?
A: Plaster tends to be stronger and more durable than drywall. It’s less prone to damage from impact but can develop cracks over time, whereas drywall is softer and more prone to denting.
Q6: How much does it cost to fix a plaster wall?
A: The cost of fixing a plaster wall varies depending on factors such as the extent of damage, labor rates, and materials needed. Minor repairs might cost less than $100, while larger repairs could run into several hundred dollars or more.
Q7: Why plaster instead of drywall?
A: Plaster offers superior durability, soundproofing, and fire resistance compared to drywall. It also provides a more traditional or historical aesthetic, which may be desirable in certain settings.
Q8: Why choose plaster over drywall?
A: Choosing plaster over drywall might be preferred for its durability, aesthetic appeal, and ability to provide better insulation and soundproofing qualities. Additionally, in historic or period properties, maintaining the authenticity of plaster may be a priority.
Q9: Is it difficult to learn to plaster?
A: Learning to plaster requires practice and skill, but it’s not excessively difficult with proper instruction and practice. Mastery may take time, but basic plastering techniques can be learned by beginners.
Q10: How many days does it take to fix drywall?
A: The time it takes to fix drywall depends on the extent of the damage and the size of the area being repaired. Small repairs might be completed in a day, while larger projects may take several days to finish.
Q11: Should I fix drywall myself?
A: Whether to fix drywall yourself depends on your skill level, the extent of the damage, and your comfort with DIY projects. Minor repairs can often be tackled by homeowners, but larger or more complex repairs may require professional assistance.
Q12: How do you repair drywall for beginners?
A: Beginner-friendly drywall repair involves steps such as cleaning the area, applying joint compound, smoothing the surface, sanding, and painting. Online tutorials and DIY guides can provide detailed instructions for beginners.
Q13: Do painters do plaster repair?
A: Some painters offer plaster repair services alongside painting jobs, especially if they have experience and expertise in surface preparation and restoration. However, specialized plaster repair professionals may be better suited for complex repairs.
Q14: How can you tell if it’s plaster or drywall?
A: To determine whether a wall is made of plaster or drywall, you can tap on it lightly. Plaster walls produce a solid, dull thud, while drywall tends to produce a hollow sound. Additionally, inspecting the edges of electrical outlets or light switches may reveal the wall material.
Q15: Do old houses have plaster walls?
A: Many older houses, especially those built before the mid-20th century, have plaster walls. Plaster was commonly used as a wall finish before the widespread adoption of drywall.
The Informed Minds
I'm Vijay Kumar, a consultant with 20+ years of experience specializing in Home, Lifestyle, and Technology. From DIY and Home Improvement to Interior Design and Personal Finance, I've worked with diverse clients, offering tailored solutions to their needs. Through this blog, I share my expertise, providing valuable insights and practical advice for free. Together, let's make our homes better and embrace the latest in lifestyle and technology for a brighter future.

